One little note....The instructions I'm giving you are for the hand sanitizers the size of the ones you get from Bath and Bodyworks, if you get others, measure and increase the size on the height as needed. I didn't and discovered mine were too tall so you won't get to see them in action today....on to the show...
This will be a Twofer...I'm going to also show you how to make the adorable puppy I used to decorate the front! How's that for a great trick!?
For the Box, you will need to cut 2 strips of card stock....
Piece 1: 2 1/2" x 9 1/2"
Piece 2: 2 1/2" x 5 1/4"
Remember, this is for the Bath and Bodyworks size bottle, you'll need to tweek it for a taller bottle.
Now you'll need to score the pieces...
Score Piece 1 @ 1 1/4", 4 3/4" & 6"
Score Piece 2 @ 1/2", 1 3/4" & 4"
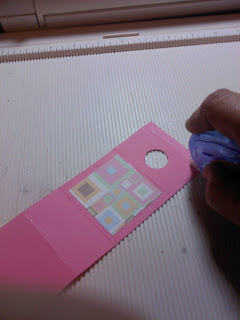
Pull out your 3/4" circle punch.....punch out the top middle on Piece 2.
Here's a diagram of the whole thing just in case you have any worries.....
Cut out 2 pieces of accent paper...
Adhere these to the fronts on each piece..
simple enough...now fold on the score lines and you'll end up with something like this....
these don't have the accent paper on them, just for demonstration purposes.
Now, glue the bottoms together
Just like this....really not that hard, but if you're worried, hold them together to see how it will look before you glue it.You will see the little tiny flap, this will be attached to the inside tall wall, so add adhesive to this and position it so it is in the correct position to cause the whole box to stand up straight. I'd recommend holding it up before gluing to get an idea of where it needs to go.
Like this.....and you'll end up with...
This!!!
At this point you could decorate the front with whatever comes to mind, in fact, if you wanted to, you could stamp an image on the area where the accent paper goes and be done, but I never do things easily...noooo, not me!
Here's the twofer....The Puppy made totally with punches! (BTW, you can purchase the punches from me through Stampin' Up, just go to stampinup.com and type my name in, you can order directly from me..online! How cool is that, or you can simply call me, visit me, email me and order that way, I'm pretty easy!)
Anyway...on to the puppy...
You will need the following 3 punches: 1 3/8"circle, 1 1/4"circle & 3/4"cricle
For my puppies, I used Stampin'Up card stock colors: Crumb Cake, Chocolate Chip, Black and White, You could use any colors really, I just had scraps of those colors in my stash.
Punch a body with the 1 3/8"circle, and a head using the 1 1/4" circle from the Crumb Cake.
Little trick....punch upside down so you can see what's going on!
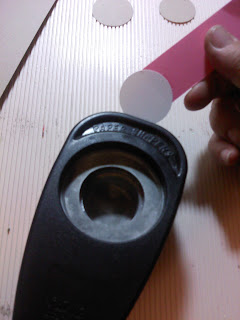
Now punch a 1 1/4" circle from white, this will be the muzzle for your puppy.......Here's another trick. You are going to punch this circle again to get the shape. You're saying..."How do I keep the circle in the punch?" Well here's the answer....you can use a bit of post it note, or a long strip with removable adhesive on the end to hold the edge of your circle...
You will only be punching a part of the circle, in a kind of leaf shape like this....(sorry if it's blurry!)
Grab that 3/4" punch now and punch a circle in black and one in Crumb Cake (or whatever you're using)
You will cut the black circle into quarters, and the Crumb Cake one in half.
Punch 2 circles with the 1 1/4" punch with your Chocolate Chip paper...
You're going to do the same thing with each of these that you did with the white for the muzzle.
For more depth and just because it looks good, ink around the edges of all the pieces (except the nose) with Chocolate Chip Stampin'Up ink and a sponge dauber. You'll end up with.......
You're probably noticing that crescent shape...that's the tail, and you're going to make one of those shapes in Crumb Cake and another color of your choosing....for the collar. It's the same basic idea as the one used for the ears and muzzle, just a lot less paper. You can simply punch the 1 1/4" circle into the edge of the paper then while holding the paper, punch out your crescent...like this:
You will trim these pieces to fit where they go on the puppy.
Another trick...see how cute those little puppy ears are? Here's how you do it. Use your bone folder and run it over the ear while pulling it into a concave shape. (My wonderful husband helped me get these pictures so you can see)
Stop laughing at my green thumbnail, I can't find the polish remover!
Now let's assemble a puppy!

Attach the ears and tail behind the puppy, put glue on the underside of the head and attach the collar....embellish collar with crystals or leave plain...whatever tickles your fancy. I used googly eyes, but you could just add dots. Put a shine on the nose with a white gel pen and Voila'...A puppy!!
Attach your puppy to the front of your box and you've got a practical, thoughtful and adorable little gift!


That is adorable! You could also use it with the little lotion bottles from Bath and Body works. Mimi you are so talented. Wish I had as much talent as you have in just your little finger. Keep making things, it's fun to see what you are going to come up with next!
ReplyDeleteI want to know with the halloween candy box did you make up your own box pattern or use the cricut?
Thank you!!! I now have to use a wheelbarrow to carry my head around.
ReplyDeleteI made my own pattern for the candy box. I use my score board. I like to make boxes from scratch because they are sturdier. I was inspired by a Stampin'Up stamp set that does candy wrappers.